Please see our video tutorial and more information on our website at: Data Set: Modifying and Saving Spreadsheet Views
The Spreadsheet Layout Tools on the Main Content Display Toolbar include:
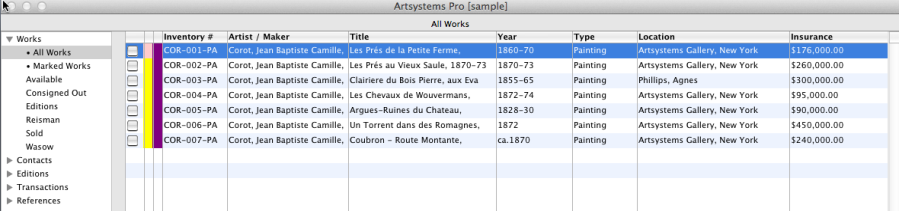
Spreadsheet Layout Display
 |
Select Complete, Basic or any saved layout from the Spreadsheet Layout drop-down menu |
Customize Spreadsheet
 button button |
Utilize the Customize Spreadsheet button to create new spreadsheet layouts |
Two spreadsheet default layout selections are part of Artsystems Pro :
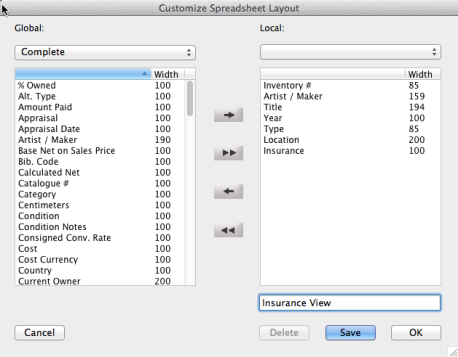
Although Artsystems Pro is delivered with the two default spreadsheet layouts, users can create and save a multitude of customized spreadsheet views to suit any need. To create a new layout begin with one of the views from the Spreadsheet Layout drop-down menu.
Local Layout
When a spreadsheet layout is edited in any manner, the Spreadsheet Layout field will automatically change the layout name to Local spreadsheet. The Local spreadsheet indicates a change was made to a saved layout. After editing the spreadsheet view, the user can save the new Local layout with a unique name to use again anytime in the future (see also Saving Layouts below).
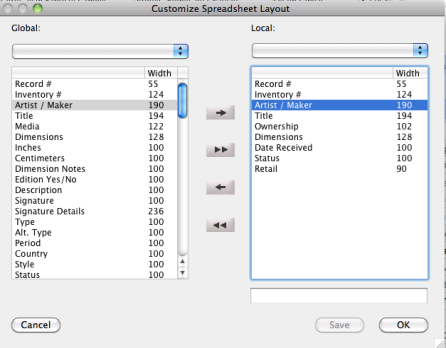
button to create and save new layouts, resize and shuffle columns as needed. button to activate the Customize Spreadsheet Layout Screen. The Customize Spreadsheet Layout Screen shows two columns: Global Layout and Local Layout. The drop-down list on the Global column shows the two default spreadsheet views, on the Local column the list shows the saved layouts only available from the user's workstation.
- Re-order the list: The first record on top will be the first column in spreadsheet view. Position a field exactly to the desired sequence, click and drag the field up or down in the list.
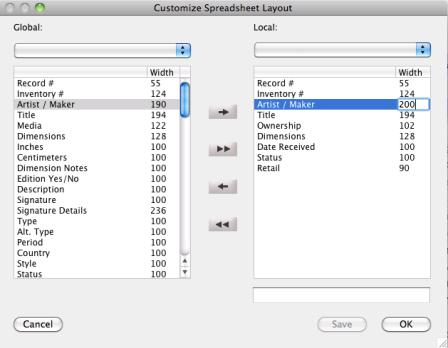
- Edit the width of the column: Click in the Width field and type the desired pixel size.
button. On the Customize Spreadsheet Layout Screen enter the new spreadsheet layout name in the white field located below the Local Layout column. NOTE: It is possible to edit previously saved layouts.
To activate the layout in which to edit, click on the Customize Spreadsheet
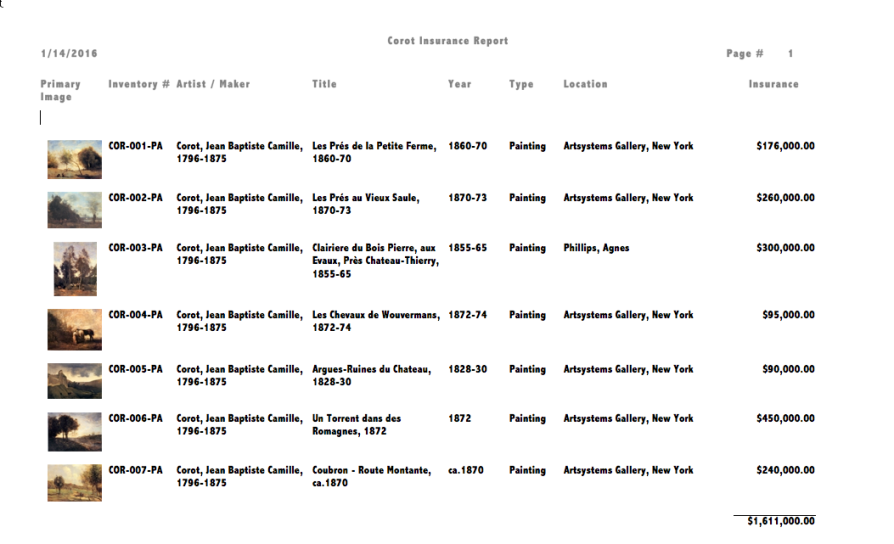
- see also Reports>Spreadsheet Reports
To Delete a Saved Customized Layout
Click the Customize Spreadsheet
In the Local column, choose the saved layout name from the drop-down list.
Click the Delete button.